Procedural Terrain Generation
One of the really powerful things you can do with programming is generating your own meshes this is used in a bunch of games from minecraft to no man's sky to create effects like water or entire procedurally generated walls so in this Blog we'll start by creating our first mesh through code.
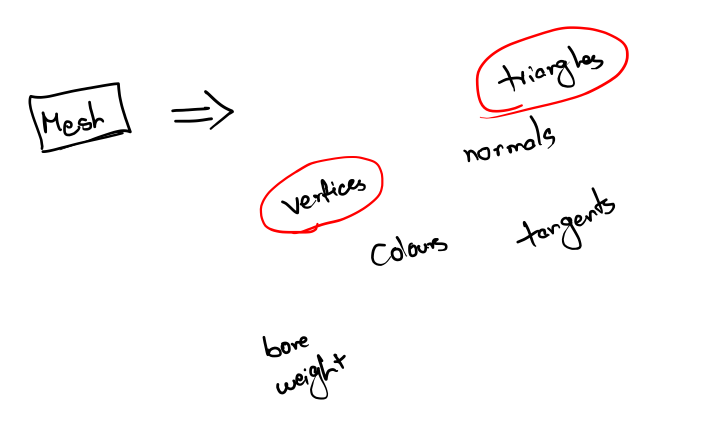
Meshes have many components like vertices, triangles, Normals, colours, tangents, Bone weight etc.. But in this Mesh generation we need to focus on only Vertices and Triangles.
Let's generate some objects so the first thing that we need to do is create an object for our mesh to do this we'll go create empty and let's name it something like mesh generator we can also reset our transform here and we now need to add two components to this object we need to add a mesh filter as well as a mesh renderer the mesh filter stores the mesh itself which contains all the information about the shape of our object if you're going here we can see that there are some default meshes to choose from such as a cubic capsule a cylinder and a plane the mesh renderer is responsible for taking this data and rendering the objects so we can actually see it this is also where we can apply a material so to generate our own mesh we of course need to create a script that does this.
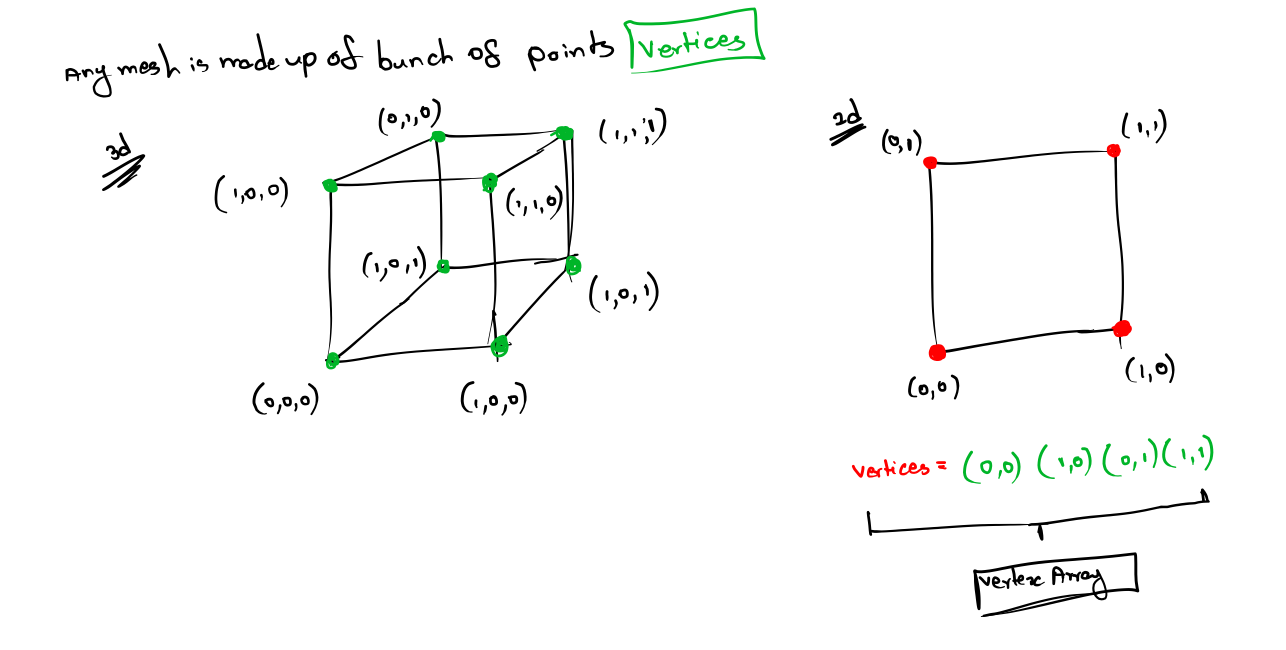
Vertices and triangles of any mesh is made up of a bunch of points called vertices each one of these vertices has a position in the world if we look at a quad we can see that it is made up of four vertices one for each corner and again each vertex has a position we can store these positions one after the other in an array this is what we call the vertex array now of course objects are made up of more than points we still need to fill in the shape to do this we use triangles in the case of our quad here we can split up into two triangles the first triangle is made up of point 0 1 & 2 to show this triangle we would add the numbers 0 1 & 2 to another array this is the triangle array the second triangle is made up of point 1 2 & 3 to also show this triangle we add these numbers to our array as well notice how the two triangles have no problem sharing the same points
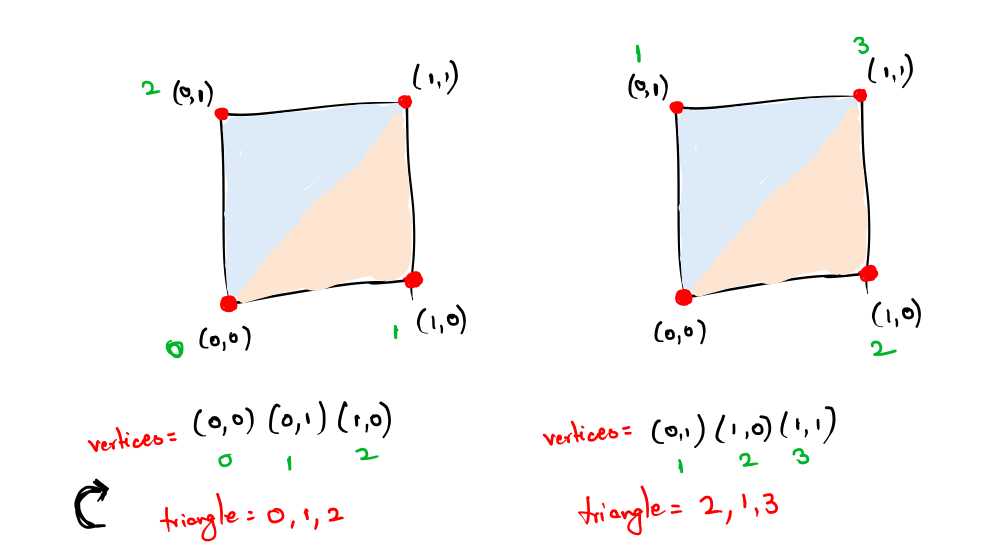
we'll probably talk more about this in the future now that's one slight issue with the way we've set up our triangle array here and that is something called back face culling back face culling is a process that eliminates the backsides of triangles in other words if a triangle isn't facing in the right direction it's not going to be drawn most engines use this process for performance reasons because normally there's no reason to draw the inside of an object after all it's not going to be seen the way that unity determines what direction a triangle is facing is the order in which we feed it the points of our triangle in unity triangles are drawn clockwise this is fine for our first triangle here we go from 0 to 1 to 2 which is in the clockwise direction however for our second triangle we're currently going from 1 to 2 to 3 which is counterclockwise and so this triangle is facing the wrong way to fix this we can simply reorder the points for a second triangle to something like 1 2 3 to 2 you can see we're now feeding the points clockwise in fact the order doesn't matter as long as it's clockwise we could just as well input 2 2 1 2 3 and it would work great now I know this can be super hard to wrap your head around in the beginning but as you start to experiment with it on your own I promise it gets much easier to visualize so inside of our script.
[RequireComponent(typeof(MeshFilter))]
public class MeshGenerator : MonoBehaviour
{
    Mesh mesh;
    Vector3[] vertices;
    int[] triangles;

    // Start is called before the first frame update
    void Start()
    {
        mesh = new Mesh();
        GetComponent< MeshFilter >().mesh = mesh;
        Createshape();
        UpdateMesh();
    }


    void Createshape()
    {
        vertices = new Vector3[]
        {
            new Vector3(0,0,0),
            new Vector3(0,0,1),
            new Vector3(1,0,0),
            new Vector3(1,0,1)
        };

        triangles = new int[]
        {
            0,1,2,
            2,1,3
        };
    }

    void UpdateMesh()
    {
        mesh.Clear();
        mesh.vertices = vertices;
        mesh.triangles = triangles;
        mesh.RecalculateNormals();
    }
}
This creates a simple quad using the vertices which we have assigned.
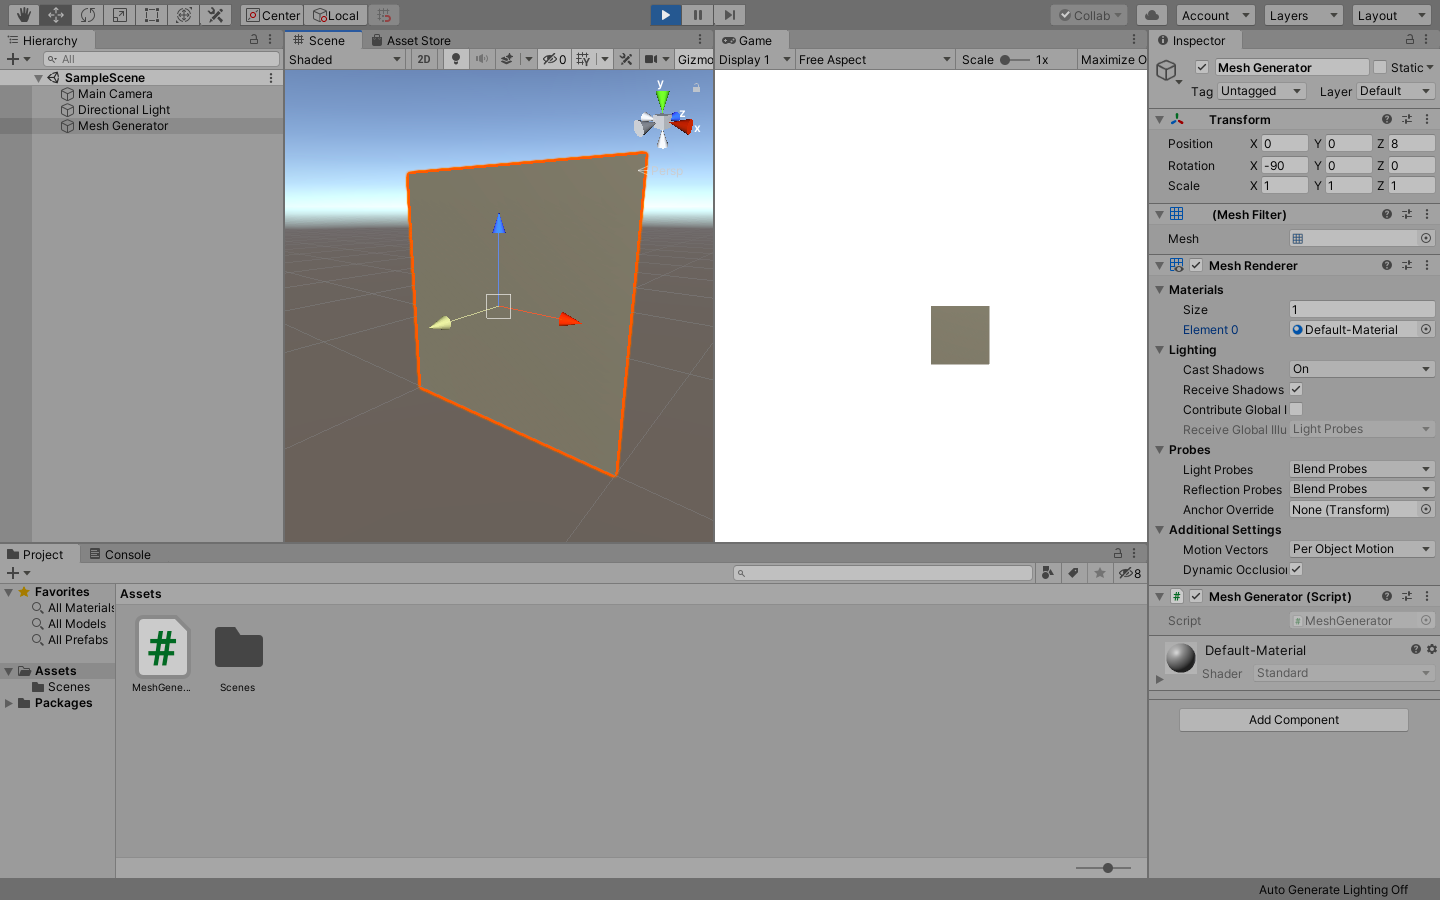 We successfully created our first mesh.
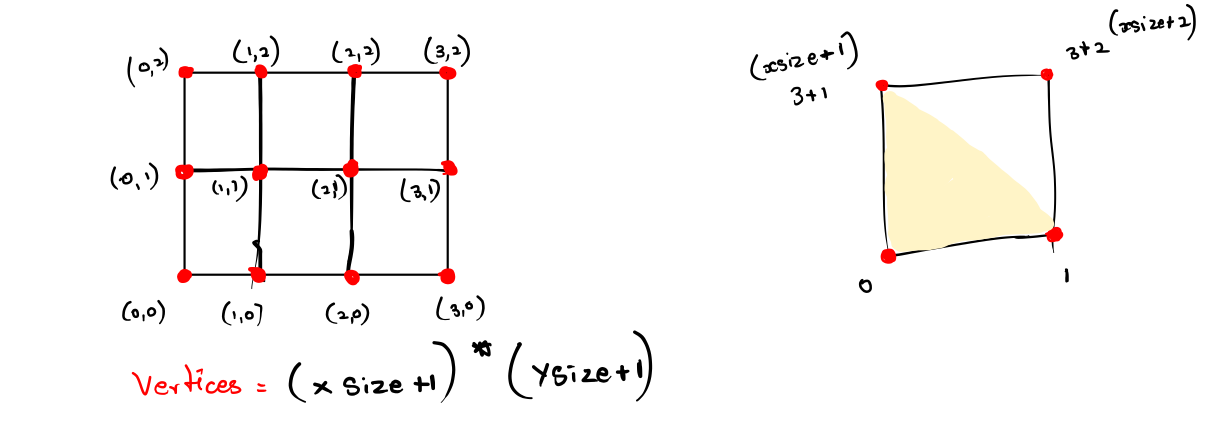
Now, lets create a procedurally created terrian. we need to create a Vertex for 20*row and 20*column
vertices = new Vector3[(Xsize + 1) * (zsize + 1)];

    int i = 0;
    for (int z = 0; z <= zsize; z++)
    {
        for (int x = 0; x <= Xsize; x++)
        {
            vertices[i] = new Vector3(x, 0, z);
            i++;
         }
     }
This creates a vertices of 20*20 rows and colunmns which you can see by Gizmos.
void OnDrawGizmos()
    {
        for (int i = 0; i < vertices.Length; i++)
        {
            Gizmos.DrawSphere(vertices[i], 0.1f);

        }
    }
This functions draws a sphere of each verices till vertices.Length and the radius of the sphere is .1f.
    void Createshape()
    {
        vertices = new Vector3[(Xsize + 1) * (zsize + 1)];


        for (int i = 0,z = 0; z <= zsize; z++)
        {
            for (int x = 0; x <= Xsize; x++)
            {
                float y = Mathf.PerlinNoise(x *0.10f, z*0.20f) * 8f;
                vertices[i] = new Vector3(x, y, z);
                i++;
            }
        }
        triangles = new int[Xsize*zsize*6];
        int vert = 0;
        int tri = 0;

        for (int z = 0; z < zsize; z++)
        {
            for (int x = 0; x < Xsize; x++)
            {

                triangles[tri + 0] = vert + 0;
                triangles[tri + 1] = vert + Xsize + 1;
                triangles[tri + 2] = vert + 1;
                triangles[tri + 3] = vert + 1;
                triangles[tri + 4] = vert + Xsize + 1;
                triangles[tri + 5] = vert + Xsize + 2;

                vert++;
                tri += 6;


            }
            vert++;
        }

    }
we basically repeat the code for the first two triangles and offset them each time to do this will first create a loop that is going to iterate over all the squares on the X so we'll create a four in x equals zero we keep going as long as X is less than the excise we'll take all of our triangle code and put it inside of this for loop we also need to create two variables one to keep track of the vertex we're currently looking at let's call that vert so int vert equals zero I will make sure to increase this by one every time we go through the loop so varis plus we also need one to keep track of the triangles let's call that int tries and set it equal to zero as well and every time we go through and have added six points to our triangles array will increase tries by six we then take our word variable which is going to increase by one each time and add it to each of the points so that as we loop through these squares the triangles will shift by one each time in other words we'll simply covert +0 vert plus excise varied plus one another word plus one very plus X is plus 1 and third plus x is plus two so for the first square vert is going to be zero and it's simply going to be zero X is plus 1 1 1 X s plus 2 and so on the second time we go through vert is going to be 1 so it's going to shift everything one to the right so this is going to be one this is going to be x i's plus two that's going to be two that's going to be two and so on and it'll keep doing this until we've gone over all the squares we also need to add the tribes to the triangle index so that we don't keep updating the first six points over and over but we actually shift to the next triangle so in our list so that we don't keep updating the first six points over and over so we'll that tries plus zero tries plus one.